How to Use Namecheap Webmail: Your Ultimate Guide to Seamless Email!
Credit: www.namecheap.com
Introduction
Welcome! Today, we will learn about Namecheap Webmail. Namecheap Webmail is a tool to manage your email. It is simple and easy to use. Follow this guide to get started.
Step 1: Login to Namecheap Webmail
First, you need to log in. Open your web browser. Go to the Namecheap website. Here is the link: Namecheap.
Click on “Login” at the top right corner. Enter your username and password. Click “Login” again. Now, you are logged in.
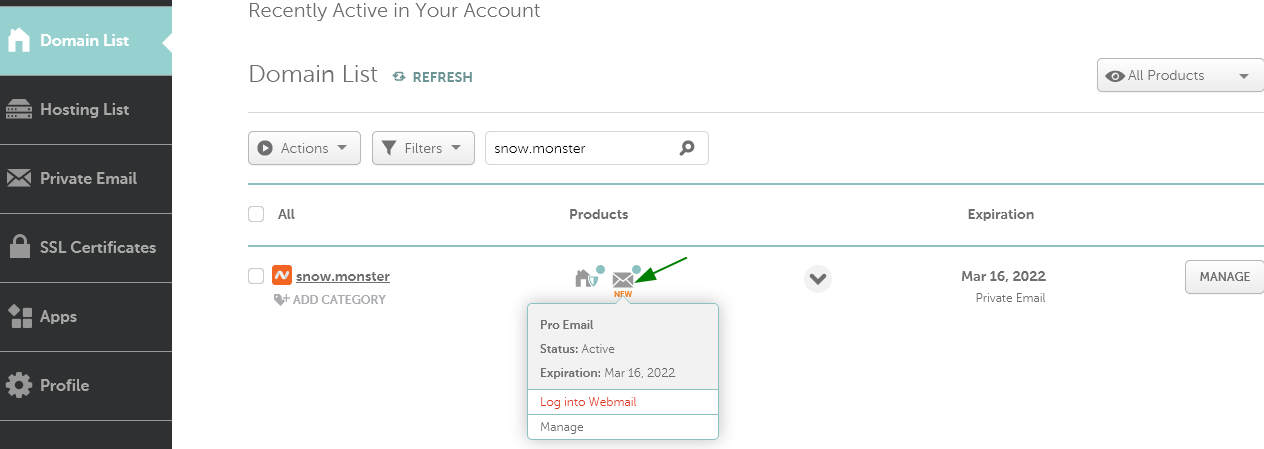
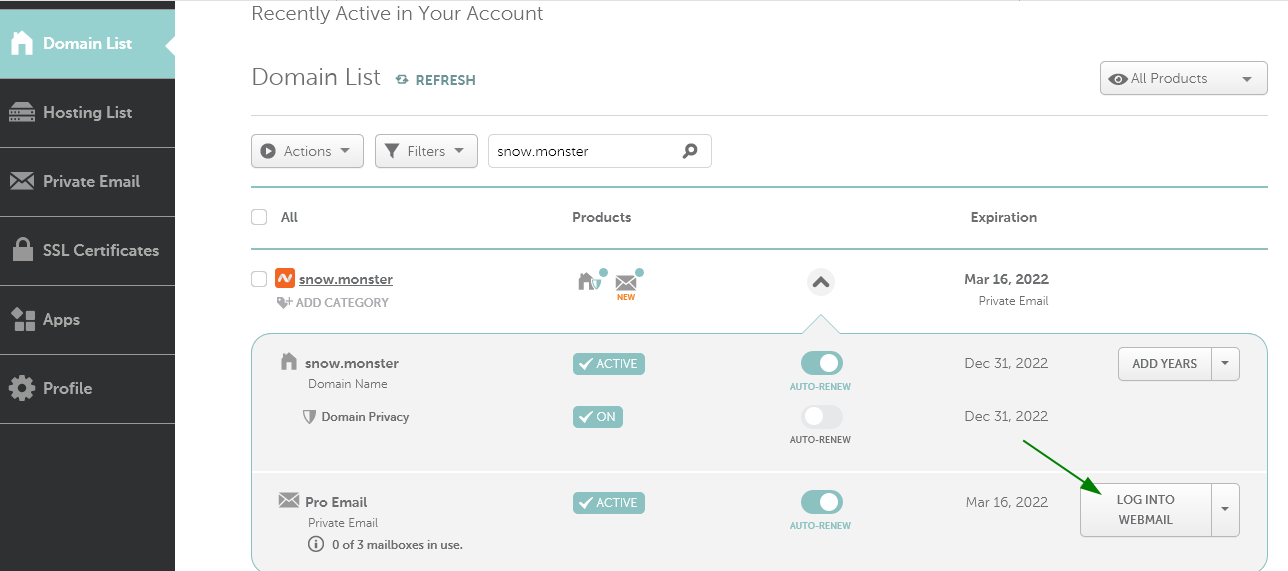
Step 2: Access Webmail
After logging in, find the “Dashboard”. Look for the “Email” section. Click on “Manage” next to your domain name. Now, you will see the “Webmail” option. Click on “Webmail”.
You will be redirected to the Webmail login page. Enter your email address and password. Click “Login”. You are now inside your Webmail account.
Step 3: Exploring the Webmail Interface
Now, let’s explore the Webmail interface. You will see different sections.
- Inbox: All your received emails are here.
- Sent: All your sent emails are here.
- Drafts: Emails you are working on.
- Trash: Deleted emails are here.
Explore these sections to understand where everything is.
Step 4: Composing a New Email
Time to write a new email! Click on the “Compose” button. It is usually at the top or on the left side.
A new window will open. Enter the recipient’s email address in the “To” field. Write the subject in the “Subject” field. Now, write your message in the large text box below.
When you are done, click “Send”. Your email will be sent to the recipient.
Step 5: Managing Your Emails
Managing your emails is important. Here are some tips:
- Organize: Use folders to organize your emails.
- Delete: Delete unwanted emails to keep your inbox clean.
- Archive: Archive important emails for future reference.
These tips will help you stay organized and efficient.
Step 6: Using Filters
Filters help to manage emails automatically. Go to the “Settings” or “Options” menu.
Look for “Filters” or “Rules”. Create a new filter. Set the conditions for the filter. For example, emails from a specific address. Then, set the action. For example, move to a folder.
Save the filter. Now, your emails will be managed automatically.
Step 7: Setting Up Signatures
Signatures add a personal touch to your emails. Go to the “Settings” or “Options” menu. Look for “Signatures”.
Create a new signature. Write your signature in the text box. You can include your name, position, and contact information. Save the signature.
Now, your signature will be added to every email you send.

Credit: www.namecheap.com
Step 8: Changing Password
Changing your password is important for security. Go to the “Settings” or “Options” menu. Look for “Password”.
Enter your current password. Then, enter your new password. Confirm the new password. Save the changes.
Now, your password is updated. Remember to keep your password safe.
Step 9: Logging Out
Always log out when you finish using Webmail. Look for the “Logout” button. It is usually at the top right corner.
Click “Logout”. You are now logged out. This keeps your account secure.
Frequently Asked Questions
How Do I Access Namecheap Webmail?
Access Namecheap Webmail by logging into your Namecheap account. Then, go to “Email” and select “Webmail. “
Can I Use Namecheap Webmail On Mobile?
Yes, Namecheap Webmail works on mobile. Simply use your mobile browser to log in.
How To Set Up Filters In Namecheap Webmail?
To set up filters, go to “Settings” in Webmail. Then, choose “Filters” and create your rules.
Conclusion
You have learned how to use Namecheap Webmail. From logging in to sending emails. From managing emails to setting up signatures. These steps will help you use Webmail effectively.
Remember to keep exploring. The more you use it, the easier it gets. Happy emailing!